*****
Supplies I Used...
1 Glass Bottle
1 Drill with a Glass Bit
1 String of clear (Or color of your choice) Holiday Lights - 25 is a good fit for a wine bottle
1 Hot Glue Gun with extra Glue Sticks
Gems - I use Aqua Gems for decorating Fish Aquariums, many colors to choose from, flat on one side for easy application
*****
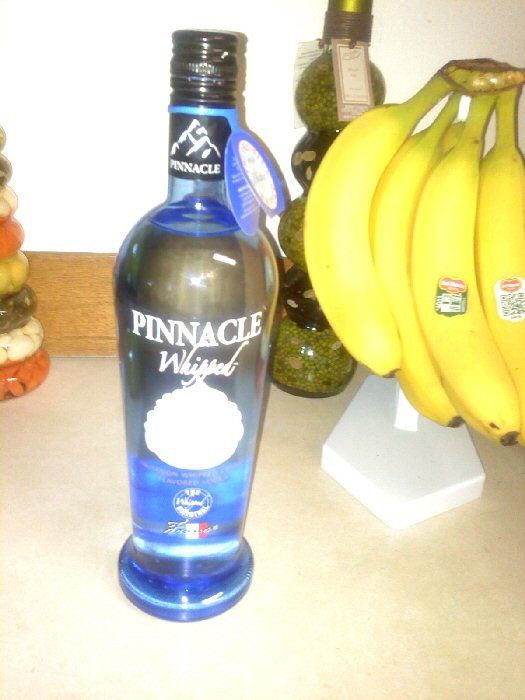
The first thing I need is a bottle that I like. I looked all over my house and didn't see one, so I went shopping. I don't drink alcohol, but found a cool blue bottle of (Get this!) Whipped Cream Vodka! lol
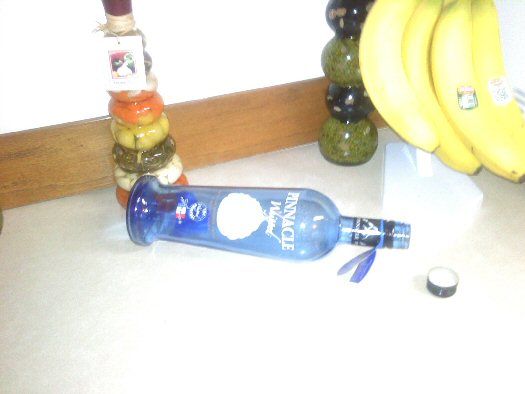
No, we did not drink it all. Hubby drank some and we stored the rest in another bottle. I tasted it, I just gagged. I'm such a lightweight! Next, the labels were peeled off and the bottle was cleaned.
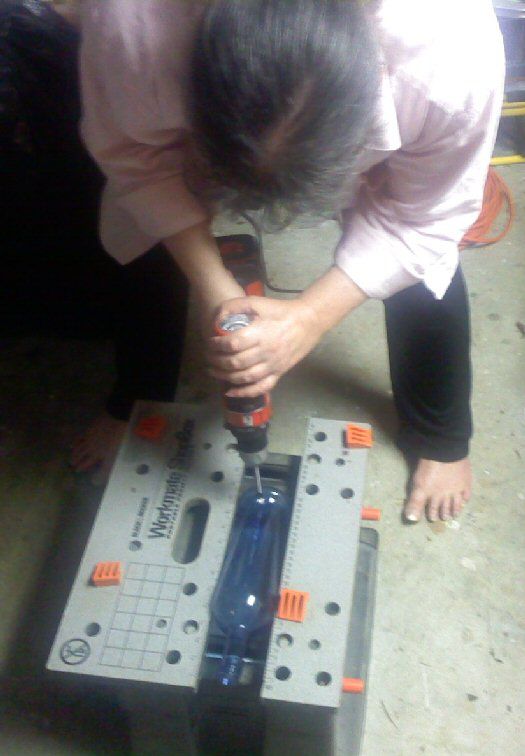
I made sure my bottle was secure on the bench and started drilling the hole. Make sure you wear eye protection. You are drilling glass, after all.
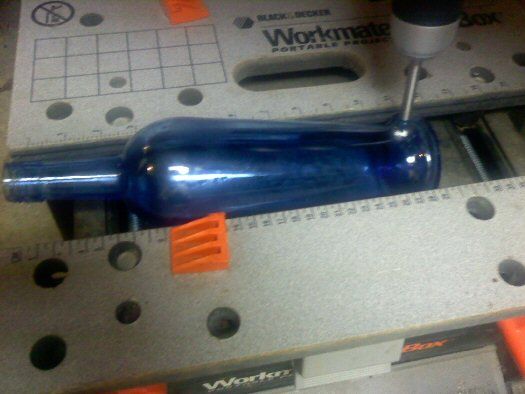
Drill a hole near the bottom of the bottle. Put light pressure and it will work it's way through the glass. It just takes a little bit of time. Be careful not to punch it straight through as you near the end. You'll hear it when it gets close, there is a noticeable sound change.
Once the hole was finished, I cleaned up the bottle of any debris, dried it thoroughly and gathered the rest of the supplies.
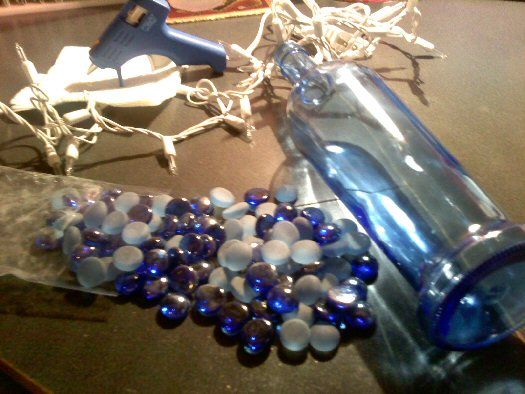
String your lights through the hole, one at a time until all are inside the bottle. I pulled the excess out the mouth of the bottle as I fed them inside. It just gave me more room to work with. I got to the end and added some hot glue around the hole, to hold the cord in place.
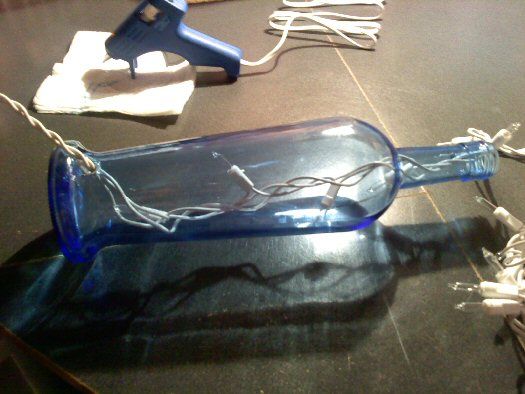
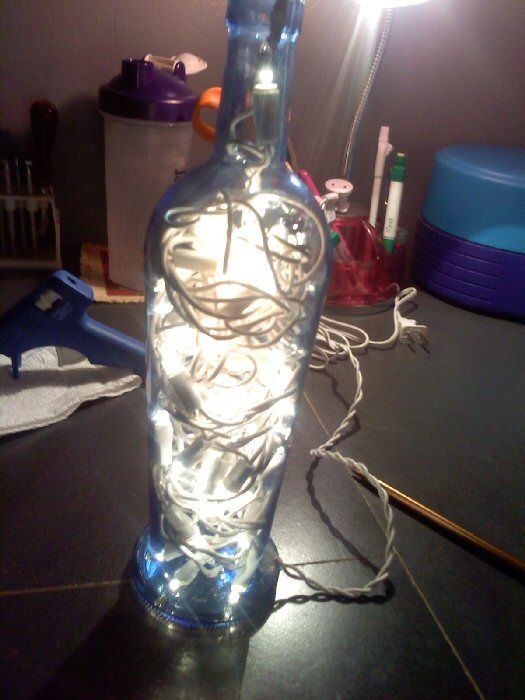
I fed the lights back inside and put the lid back on. Now to test and make sure the lights still work! Hooray! We have power! My bottle looks very full because I could not find a string of 25, so I had to use 50! It is much easier with 25.
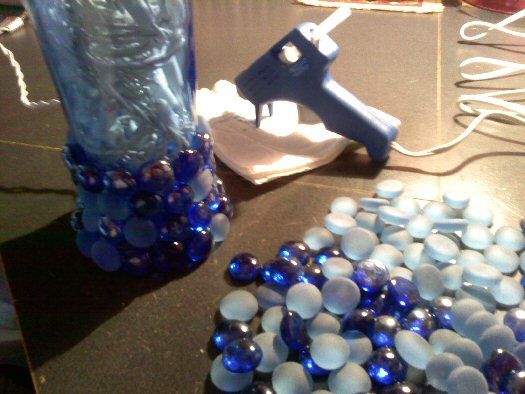
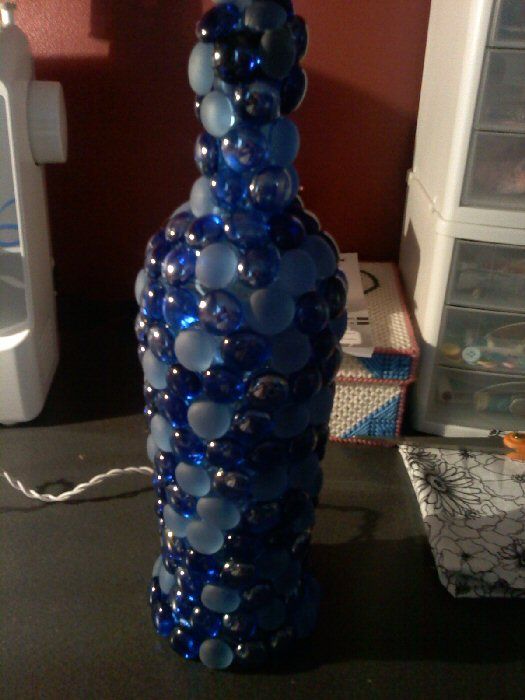
Now, the fun part! Using your hot glue gun, simply glue your gems all over the bottle. Use any pattern you like, make designs or just place them randomly. Try to cover all areas as much as possible. I cover the lid too. If you think you might want to replace a burnt out bulb in the future, you could leave the tiniest gap at the lid to allow you to open it and replace a bulb. This would be quite difficult if the burnt bulb is at the bottom. The best thing, to me, is to make sure you buy light sets that do not all go out if one bulb quits.
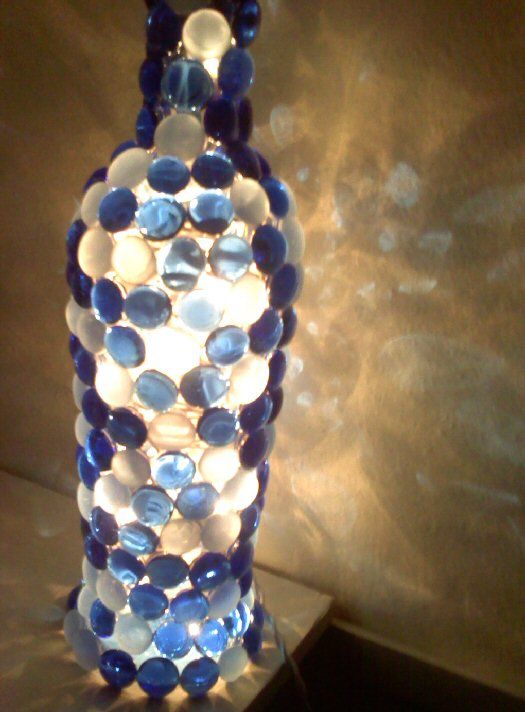
The finished Night Light! It is so pretty! Want to know how it looks lit? Let me go find a dark place and test it.
So, the moment of truth. I am in my hall linen closet. It's scarey dark in here. Oh, let me turn on my handy dandy night light! Voila! It is beautiful! I love it and want to keep it for myself! No, I made it as a gift for my son. Next project? A pink one for me! I saw some really pretty pink gems when I was getting the blue ones! Muhahaha
I hope you like my son's new night light. Now, excuse me, I have to go get the supplies together to make mine! I am going to get round bottles, square bottles, short ones, tall ones! Everyone might get a nightlight for Christmas, this year! lol
-Originally Posted on June 13, 2012, by Stef-
No comments:
Post a Comment